-
0. General information
- 1. Installing
- 2. Add demo content
-
3. Customize theme
-
4. Customize theme – About SagaBlog
-
5. Customize theme – Site identity
-
6. Customize theme – Header options
- 7. Customize theme – Main slider
-
8. Customize theme – Recommended articles
- 9. Customize theme – Theme options
-
10. Customize theme – Menus
-
11. Customize theme – Colors
-
12. Customize theme – Reset settings
-
13. Post formats
-
14. Contact page
-
15. Page without sidebar
-
16. Sources and credit
SagaBlog Light
SagaBlog Light
-
0. General information - top
Theme demo: http://sagablog-light.wdvillage.com/
Theme: https://wdvillage.com/product/sagablog-light/
Thanks for using SagaBlog Light- personal WordPress blog theme with mobile-friendly design. This is a best choice for any personal blog.
Please, read this documentation before you get started. In this documentation, you can find how you can customize the theme. If you have any questions, please contact us on email.
-
1. Installing - top
-
1.1 Install WordPress - top
To install SagaBlog Light WP theme you must have WordPress installed. If do not - you can follow the instructions in WordPress Codex.
-
1.2 Install theme - top
Install SagaBlog Light wp theme by using “WordPress Theme Manager”.
You can install SagaBlog Light theme by using “WordPress Theme Manager“. You need to do next:
- Go to admin panel and after that go to “Apperance -> Themes” and press “Add New“:
- After that write “SagaBlog Light” in search field.
- Now you can find SagaBlog Light theme in tab “Themes", install and activate it.
Install SagaBlog Light theme by using FTP upload.
You can download sagablog-light.zip from wordpress.org, unzip archive and place this folder called sagablog to /wp-content/themes/ folder in your WordPress folder on your server. You can use any FTP software also, for example FileZilla.
-
-
2. Add demo content - top
If you want to install demo content for WordPress theme SagaBlog Light – first you need to install plugins ‘One Click Demo Import’ and ‘Contact Form 7’. Plugin ‘One Click Demo Import’ will add demo content to your site and plugin ‘Contact Form 7’ – will show contact form on contact page. You must install both plugins. Demo content contains the contacts page. You will receive an error when importing the demo content if you do not install plugin ‘Contact Form 7’.
Demo Content is recommended to be established at the clean WordPress version.
You can download Demo data from theme home page.
After installing and activating plugins you can importing demo content.
-
2.1 Installing recommended plugins - top
After installing and activating theme SagaBlog Light theme in the top of page you can see list of recommended plugins. Press ‘Begin installing plugins’.
Install ‘One Click Demo Import’ plugin.
Return to Required Plugins Installer and install plugin ‘Contact Form 7’.
You must activate plugins ‘One Click Demo Import’ and ‘Contact Form 7’. Now you can add demo content.
-
2.2 Importing demo content - top
Now, when you have installed and activated plugins ‘One Click Demo Import’ and ‘Contact Form 7’ you can import demo content.
Open Appearance-> Import Demo Data.
You must chooce files from folder ‘Demo data’ (zip file with demo data you can download from this page ) and press button ‘Import Demo Data’.
You must wait and after some minutes you can see ‘all done’.
Now you can see demo content on your site.
-
2.3 Add menu - top
Now you can choose ‘Menu-demo’ how primary menu.
Open Appearance->Menus and press ‘Manage Locations’.
Choose ‘Menu-demo’ and save changes.
After that you can add slider by using customizer.
-
-
3. Customize theme - top
SagaBlog Light theme is using the Theme Customization API for customizing theme options. To customize this theme you must open customizer. You can open customizer here: "Appearance -> Customize". Now you can see that theme options you can customize.
-
4. Customize theme – About SagaBlog - top
In the section ‘About “SagaBlog Light”‘ you can find links to SagaBlog Light theme demo and to documentation for SagaBlog Light theme.
-
5. Customize theme – Site identity - top
In the section ‘Site Identity’ you can write site name and site description. You can load site icon that your visitors will see in browser. You can add logo near your site name.
-
6. Customize theme – Header options - top
In the section “Header options” you can change how header of your site will look like.
Here you can change:
- Do you want show search box near main menu or not.
- You can change site title and logo position on front page/home page:
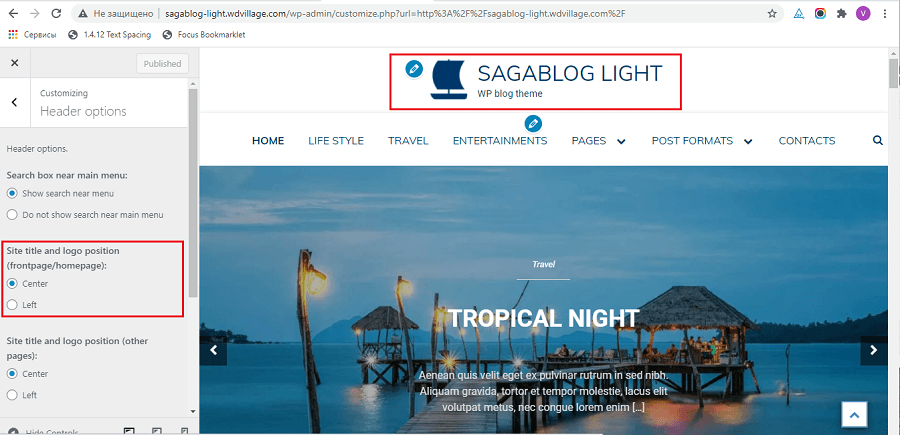
- You can change site title and logo position for all other pages.
- You can change menu alignment and you can change menu placement (before or after main slider) if you add main slider on header.
-
7. Customize theme – Main slider - top
In the section “Main slider” you can choose what posts and pages will shows in main slider and change slider options. This section contains 3 charpers: Main slider settings, Main slider on header, Main slider on front/home page.
-
7.1 Main slider settings - top
In chapter “Main slider settings” you can choose where you want to show the slider:
- In header.
- Inside front/home page.
- In header and inside front/home page (you can choose different posts for different sliders).
If you will use slider type – Fullwidth slider – you can choose how many characters will shown in the announcements or you can hide announcements.
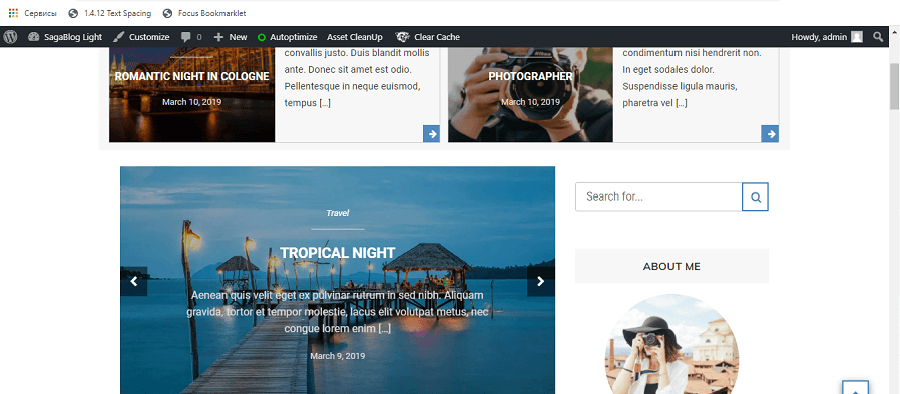
Here you can see main slider (type Carousel slider) in header:
Here you can see main slider (type Fullwidth slider) in front/home page:
-
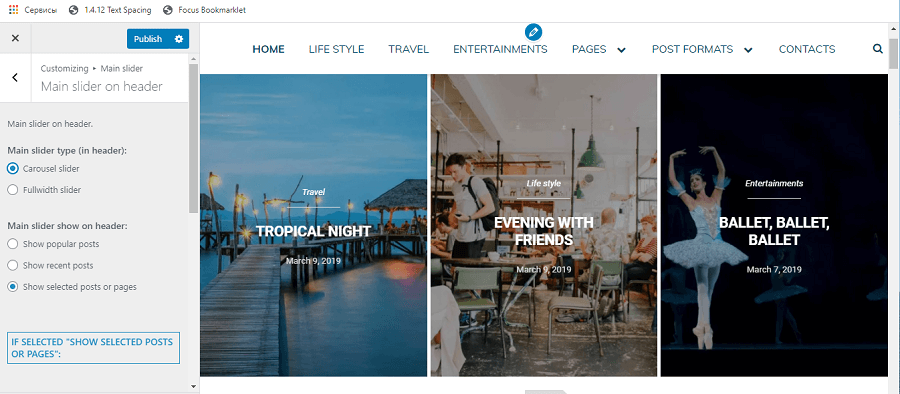
7.2 Main slider on header - top
In chapter “Main slider on header” you can choose main slider type – Carousel slider or Fullwidth slider.
Also you can choose what you want to show in the slider:
- Show popular posts
- Show recent posts
- Show selected posts or pages
If you selected “Show popular posts” or “Show recent posts” you can change how many posts will show main slider (it is 5 by default).
If you selected “Show selected post or pages” you should select posts or pages from the drop-down lists.
-
7.3 Main slider on front/home page - top
In chapter “Main slider on front/home page” you can choose the same options how for chapter 7.2.
-
-
8. Customize theme – Recommended articles - top
In the section “Recommended articles” you can choose what posts will shows how recommended articles.
In chapter “Settings” you can choose where you want to show recommended articles:
- Do not show block with recommended articles.
- Block with recommended articles have full width.
In chapter “Add recommended posts” you can choose what posts you want to show in block with recommended articles.

-
9. Customize theme – Theme options - top
-
9.1 Author box - top
You can show/hide author box on post pages.
-
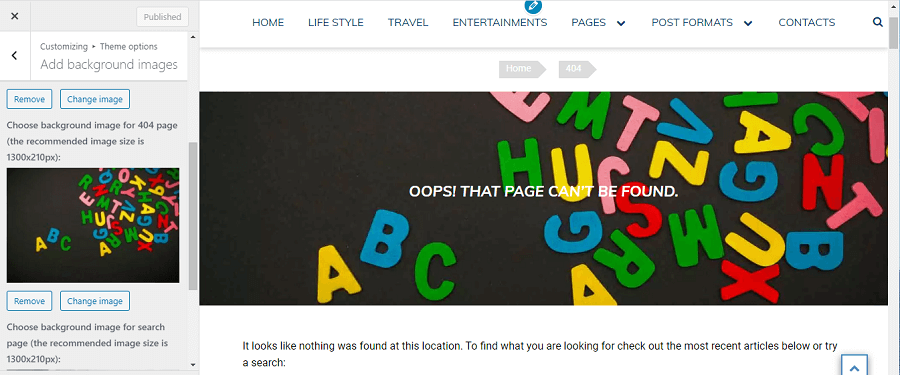
9.2 Add background images - top
You can add background image for archive page (Category, author, date, tag …). You can add background image for 404 page and for page that show search result. Here you can see background image on 404 page:
-
9.3 Layouts options - top
In chapter ‘Layout Options’ you can change layout options.
You can choose sidebar position: ‘Left sidebar’, ‘Right sidebar’, ‘No sidebar’.
-
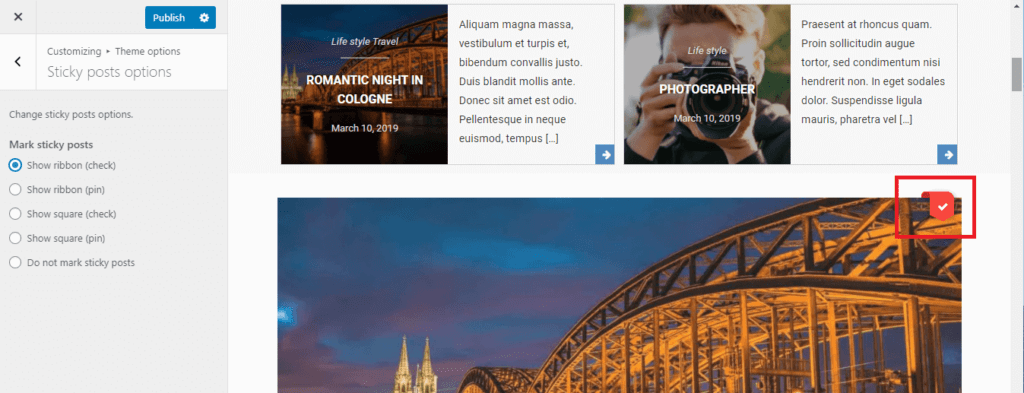
9.4 Sticky post options - top
In chapter ‘Sticky post options’ you can choose sign that will mark sticky post. For example you can choose ribbon with ‘check’:
-
9.5 Front page type - top
In chapter ‘Front page type’ you can choose what kind of front page type you want use in your blog and how many words you want to show in articles on front page.
There are next front page types:
- List (Articles are large)
- List (Articles have an average size (Pictures are on the left))
- List (Articles have an average size (The position of the pictures alternates))
- Masonry (Articles are small)
-
9.6 Copyright text - top
In chapter ‘Copyright text’ you can change year in copyright text in footer. And you can show/hide copyright text.
-
-
10. Customize theme – Menus - top
SagaBlog Light theme supports one menu. You can make new menu in customizer (You can also edit the menu in section ‘Appearance -> Menus’).
-
11. Customize theme – Colors - top
In the section “Colors” you can select:
- Header text color
- Background Color for Main Menu
- Main Menu text color
- Background Color for Footer
- Main Color
- Complementary color
-
12. Customize theme – Reset settings - top
In the section ‘Reset settings’ you can reset settings to the default values.
-
13. Post formats - top
SagaBlog Light theme supports 2 post formats:
- Post format aside
- Post format gallery
-
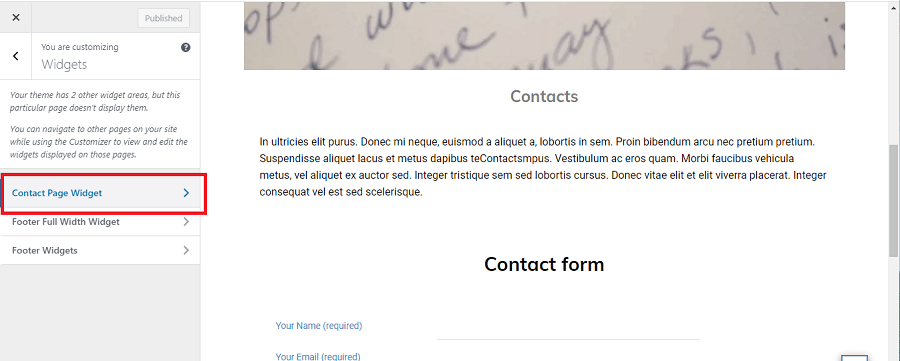
14. Contact page - top
If you want to make page with your contact information and contact form you can use for this page template ‘Contacts’.
You must use plugin ‘Contact form 7’ for your contact form. You can read more about this plugin here. You need to install and activate this plugin. You will see new line in admin part of your site – “Contact”. You can make new contact form and place shortcode on your contact page.
But this template – ‘Contacts’ have widget area therefore you can place widgets here. For example widget ‘WDV About Me Widget’:
-
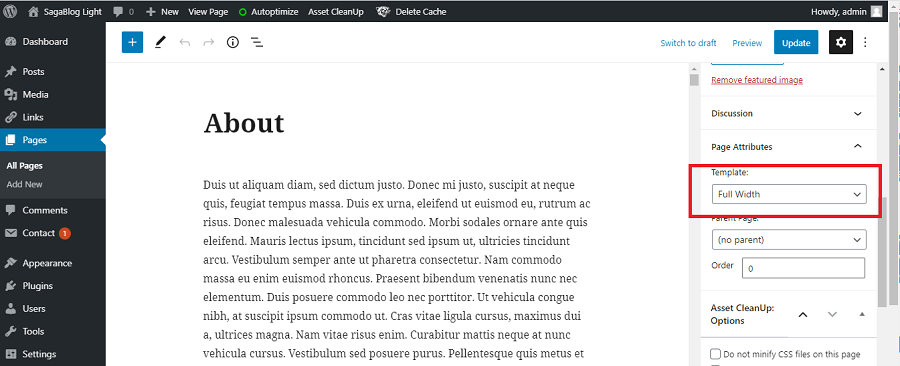
15. Page without sidebar - top
If you want to make page without sidebar you can use for this page template ‘Full width’:
-
16. Sources and credit - top
We have used this files and libraries:
Included Libraries
- Underscores http://underscores.me/
- Normalizing styles http://necolas.github.com/normalize.css/
- Font Awesome http://fontawesome.io
- Slick – https://owlcarousel2.github.io/OwlCarousel2/
- enquire.js http://wicky.nillia.ms/enquire.js
- Blazy https://github.com/dinbror/blazy/
- Cssanimation https://github.com/yesiamrocks/cssanimation.io
- Masonry http://masonry.desandro.com
- jQuery – http://jquery.com/
- Magnific Popup – http://dimsemenov.com/plugins/magnific-popup/
- TGM Plugin Activation – http://tgmpluginactivation.com/
- Animate.css https://github.com/daneden/animate.css
- WOW js https://wowjs.uk/
Fonts
- Default header font ‘Muli’- https://fonts.googleapis.com/css?family=Muli
- Default body font ‘Roboto’- https://fonts.googleapis.com/css?family=Roboto
- Font Awesome – http://fontawesome.io
Photos in demo
Images: http://pxhere.com/
All images taken from pxhere.com released under the CC0 Public Domain.